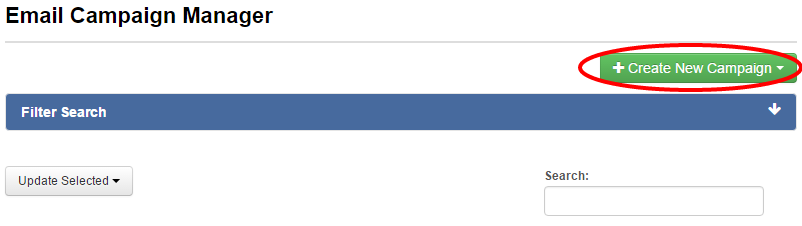
1. Navigate to the Marketing tab

2. Click Create New Campaign
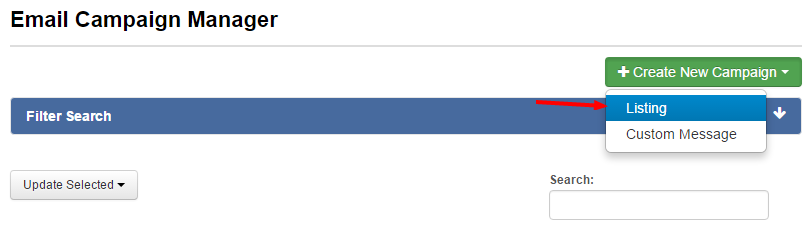
3. Select Listing from the drop down menu
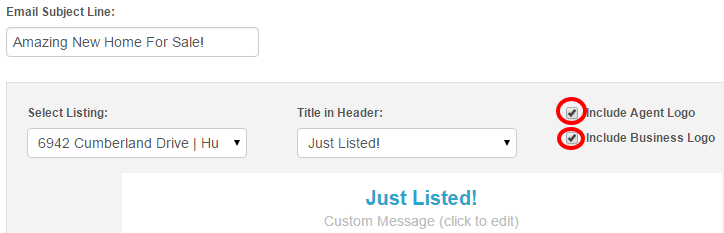
4. Enter your email’s title in Email Subject Line
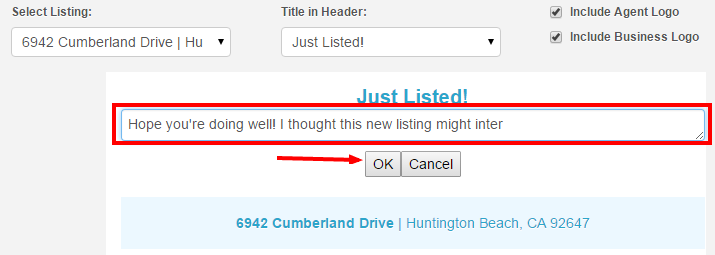
5. Select a listing in the Select Listing drop down menu

6. Select a Title in Header
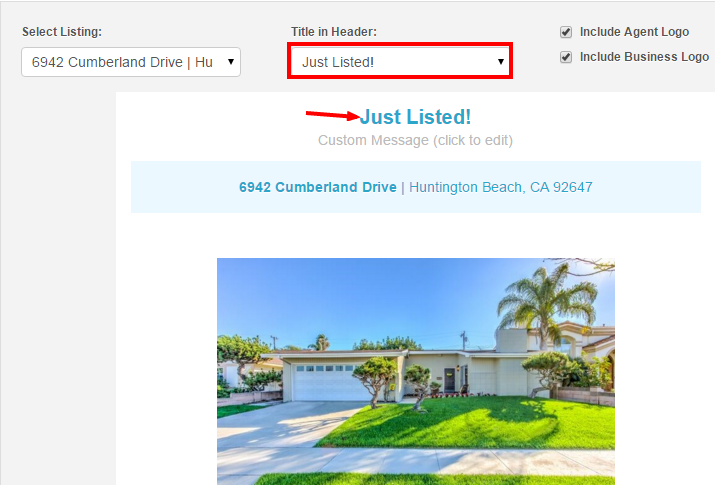
7. Select the boxes to include your agent logo and business logo.
8. Enter a custom message if desired and click OK
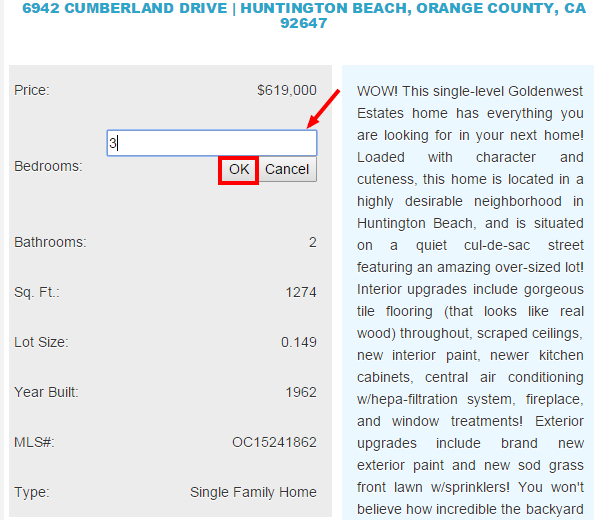
9. Edit any of the verbiage you wish to update by clicking on the text
10. Select the recipients of email

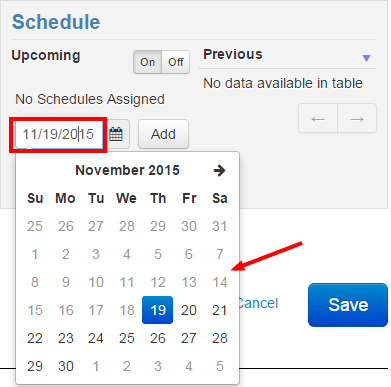
11. Select a date for the listing email to be sent by clicking on the white box with your desired date, then click Add
12. Click Save
Last Update: June 12, 2019