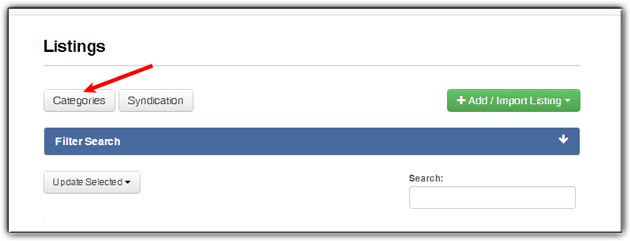
1. Navigate to the Listings tab

2. Click Categories
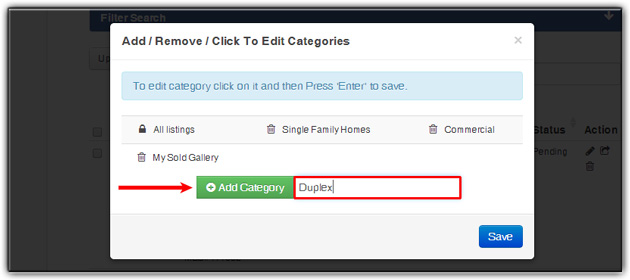
3. Type in the name of the new category, and then click Add Category
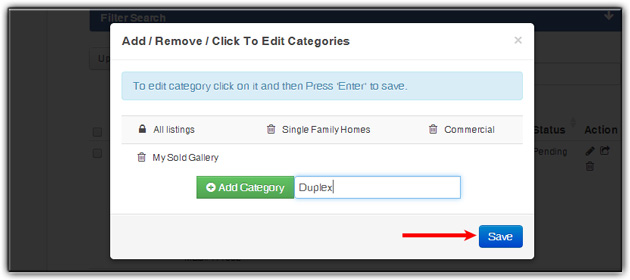
4. Click Save
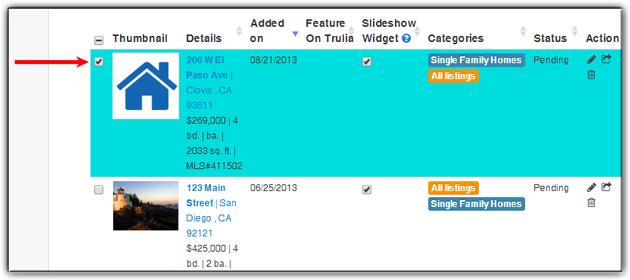
5. Click on the checkbox next to the listings you would like to assign to the new category
6. Click Update Selected
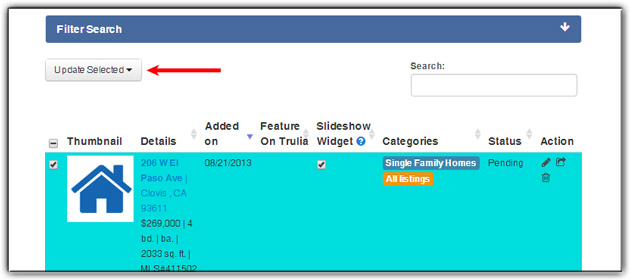
7. Select Assign Categories

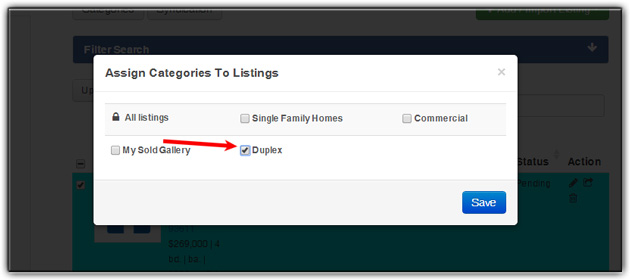
8. Select the appropriate category then click Save
Adding this category, as a separate listing page.
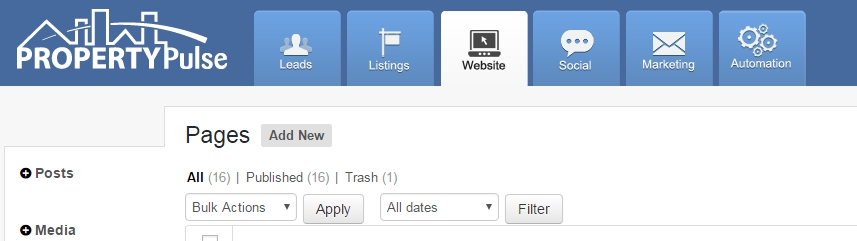
9. Navigate to the Website tab

10. Click Add New
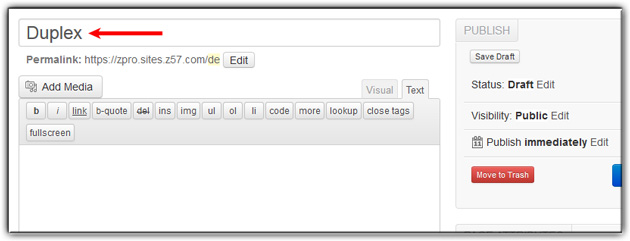
11. Title the page
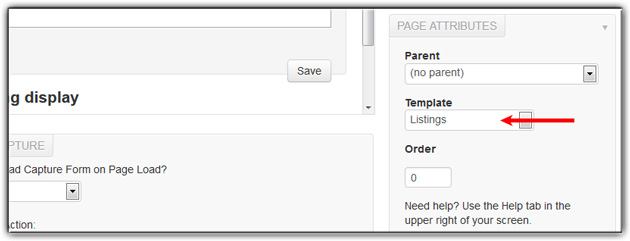
12. In the Page Attributes section, change the Template to Listings
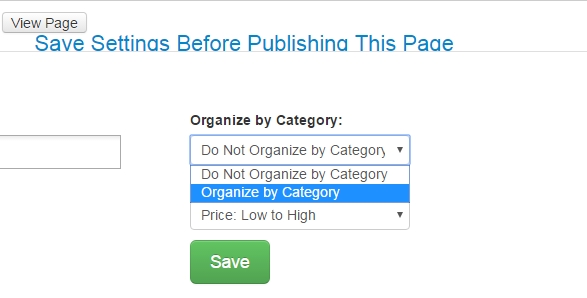
13. In the center, select Organize by Category
If you want only the ACTIVE listings to display select the “Just Listed, Just Reduced, Active, and Pending” status’, in the “Choose Status” field.
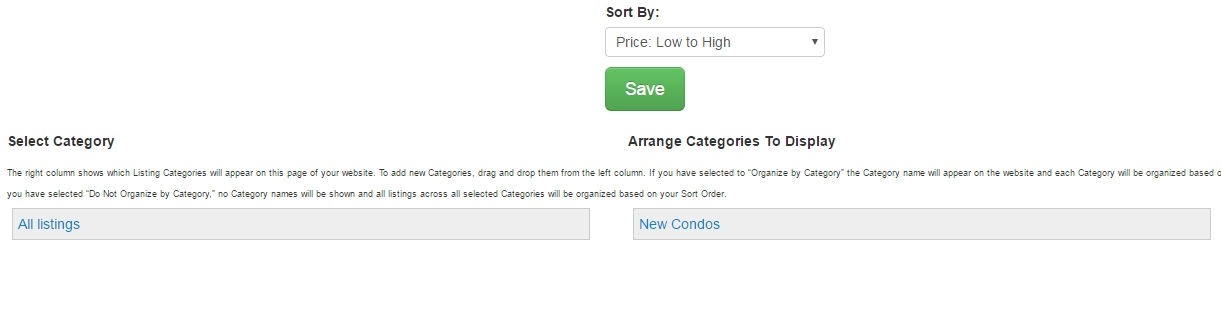
14. Click and drag the categories to display
15. Click Save
16. Click Publish
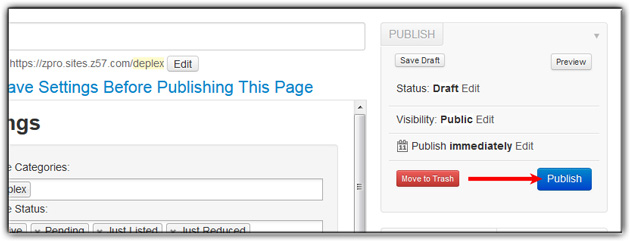
You must click “Save” before you can “Publish” or “Update”
Adding the Page to the Dropdown Menu.
To add this new listings page to your menu, please read this article.
Last Update: June 12, 2019